Table of contents
- Introduction to Hadoop on the Cluster
- A walk through basic YARN example for a word count
- Example with command line arguments
- Using a SOCKS proxy to access Hadoop Web UI components
Introduction to Hadoop on the Cluster
Hadoop is a software framework implemented in Java for distributed data storage and processing. In this tutorial, we will show you how to initiate a Hadoop instance, how to set up your local environment to run Hadoop, how to create Hadoop functions, how to write files to the Hadoop Distributed File System (HDFS), and how to retrieve results from HDFS once your job completes.
Hadoop with the High Performance Computing Facility currently has the following packages available:
- Hadoop Distributed FileSystem (HDFS)
- MapReduce2
- YARN
- Hive
- HBase
- Pig
- Sqoop
IMPORTANT NOTE: Data stored in hadoop (HDFS) is NOT backed up and WILL be deleted when your alloted Hadoop instance ends. It is therefore up to you to copy over and save any relevant data/results to a more permanent solution such as your home space or group space.
A walk through basic YARN example for a word count
To ensure all necessary environment variables and modules are loaded please type the following:
$ module load default-environment
Then to create a temporary Hadoop cluster (4 nodes in this case) use the following command:
$ start_hadoop 4
NOTE: This command might take a while, please be patient.
Once the temporary Hadoop cluster has been allocated and properly setup you should be put back into a command prompt on the name node of your cluster (the first node in the node list).
NOTE: If you are not put onto a name node, simply ‘ssh’ into the first node of your allocation.
You will also be prompted to load several modules that will allow you to access Hadoop packages, the command will look something like the following (INSTANCE ID should be substituted with the ID of your temporary Hadoop cluster):
module load hadoop/hdfs{INSTANCE ID} hbase/hdfs{INSTANCE ID} hive/hdfs{INSTANCE ID} pig/hdfs{INSTANCE ID} spark/hdfs{INSTANCE ID} sqoop/hdfs{INSTANCE ID} zookeeper/hdfs{INSTANCE ID}
With this all completed, you can now move on to program with Hadoop from the command-line. Please note that several Hadoop applications, such as Spark or Hive, allow users to take advantage of a convenient web interface for submitting and monitoring related jobs. At the end of this tutorial, there is a quick tutorial on how to get started using a SOCKS proxy to access these web UI components from behind the cluster’s firewall.
Now that you have these modules loaded, lets create a new Java file called WordCount.java, which just keeps a count of how many times each unique word appears and will act as our Hadoop processing function:
Download: WordCount.java
Once you have created this file, we can compile it and turn it into a jar file using the following commands:
$ hadoop com.sun.tools.javac.Main WordCount.java
$ jar cf wc.jar WordCount*.class
If you are trying to compile with Java and HBase use the following command which will ensure that HBase classpaths are correctly loaded:
hadoop com.sun.tools.javac.Main -cp $(hbase classpath):$(hadoop classpath) WordCount.java
Now that we have our YARN function compiled and placed into a jar format, we need data to process, for now we will use this single text file:
We also need to create a directory in HDFS and load the test file into the directory, which we can do with the following commands:
$ hadoop fs -mkdir /user/slet1/input
$ hadoop fs -put test.txt /user/slet1/input/
We can do a Hadoop ‘ls’ to check whether the file was loaded correctly. If done correctly, the output should produce something close to the following:
$ hadoop fs -ls /user/slet1/input
Found 1 items
-rw-------   3 slet1 hadoop         82 2015-04-08 14:24 /user/slet1/input/test.txt
The data is now stored onto the HDFS, so we will run the function we had created before:
$ yarn jar wc.jar WordCount /user/slet1/input/test.txt /user/slet1/output
In this command we are telling YARN that we are passing it a jar archive file with the main function located in a .java file called WordCount, that the file we want to process is /user/slet1/input/test.txt, and that we want output written to a folder with the path: /user/slet1/output
Once the job completes, do an ‘ls’ on the directory that you wrote your output to and you should see something close to the following:
$ hadoop fs -ls /user/slet1/output
Found 2 items
-rw-------   3 slet1 hadoop          0 2015-04-08 14:28 /user/slet1/output/_SUCCESS
-rw-------   3 slet1 hadoop         88 2015-04-08 14:28 /user/slet1/output/part-r-00000
We want to print out the contents of the file named ‘part-r-00000’, so we’ll use a Hadoop ‘cat’ operation:
$ hadoop fs -cat /user/slet1/output/part-r-00000
Goodbye 1
Hello   1
world   2
To retrieve the output file from HDFS and print out the contents locally we can use the following command:
$ hadoop fs -get /user/slet1/output/part-r-00000 output.txt
$ cat output.txt
Goodbye 1
Hello   1
world   2
NOTE: When you run the ‘get’ operation you may receive the following warning, but it will not affect the get operation: WARN hdfs.DFSClient: DFSInputStream has been closed already
Now, to clean up the directories after having run our job, type the following:
$ hadoop fs -rm -r /user/slet1/input /user/slet1/output
Example with command line arguments
In this tutorial we will give an example of how to pass command line arguments to a Hadoop function and have the function process multiple files. This time we will use a very similar function with a few key changes. As the name of the file implies, this function will search for a specific word passed through the command line and print out the number of times it appears in the dataset. As an important note, to pass arguments from the ‘main’ function to either the Map or Reduce classes you must pack the data within a Configuration object, which you can then access from within either of these classes.
Download: WordSearch.java
To compile the code and convert to a jar file use the following commands:
$ hadoop com.sun.tools.javac.Main WordSearch.java
$ jar cf ws.jar WordSearch*.class
This time for our datasets we will use two larger files: constitution.txt and declaration.txt Like before, we need to create an input directory in HDFS and pass our files to it:
$ hadoop fs -mkdir /user/slet1/input
$ hadoop fs -put const.txt /user/slet1/input/
$ hadoop fs -put decl.txt /user/slet1/input/
Doing a Hadoop ‘ls’ should display the following:
$ hadoop fs -ls /user/slet1/input
Found 2 items
-rw-------   3 slet1 hadoop      45771 2015-04-08 16:37 /user/slet1/input/const.txt
-rw-------   3 slet1 hadoop       8031 2015-04-08 16:37 /user/slet1/input/decl.txt
Now to run our jar file, we use the following command:
$ yarn jar ws.jar WordSearch /user/slet1/input/* /user/slet1/output the
Printing the output file gives us the following result:
$ hadoop fs -cat /user/slet1/output/*
the     805
The format is the same as when we submitted to job before, but we have added an additional argument to the end of the list, which is the phrase that we are searching for.
Same as before, to clean up the directories after having run our job, type the following:
$ hadoop fs -rm -r /user/slet1/input /user/slet1/output
Using a SOCKS proxy to access Hadoop Web UI components
As you might imagine or have tried and realized, the maya cluster sits behind a firewall that makes it inaccessible from the world wide web. This is necessary for security on the cluster but it also means that you can’t just access a node directly from a browser…or can you? In fact, by using a SOCKS proxy, you can redirect web content from a given node to your browser, allowing you to use and interact with whatever service you need access to. The following is a short tutorial on doing this with the Mozilla Firefox Browser (version 49.0.1).
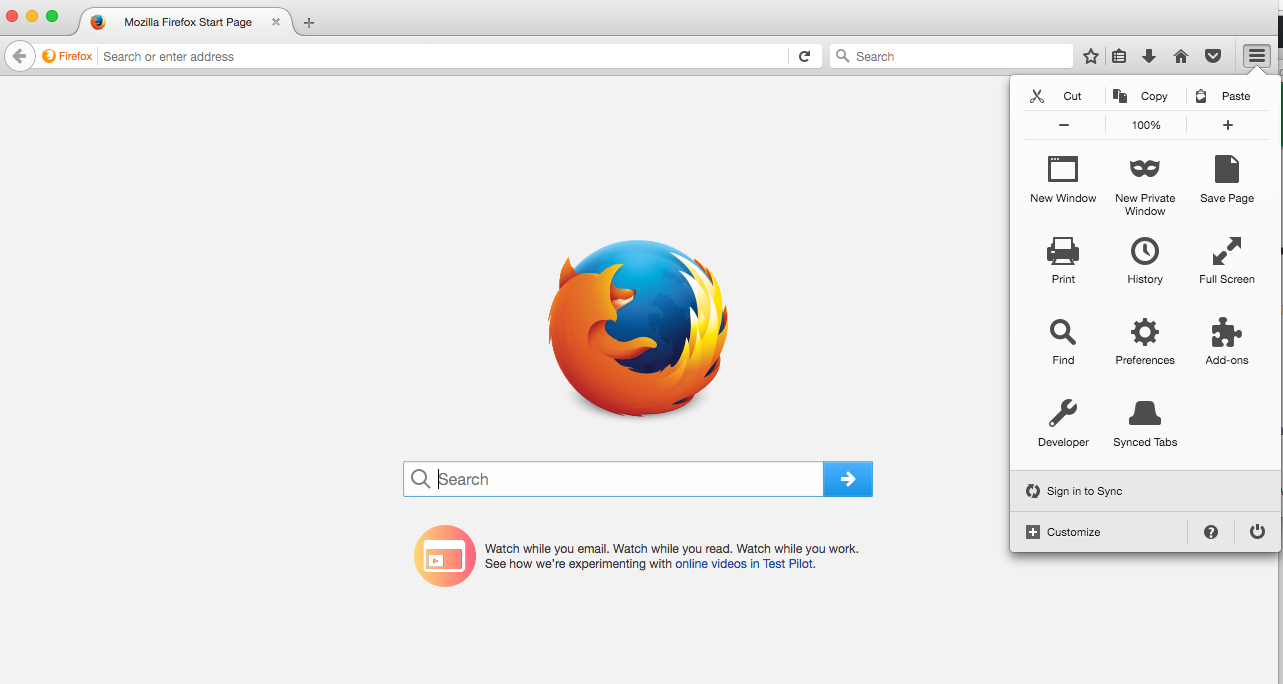
First thing to do is to open the firefox browser and head to the options button located in the top right corner and then clock the Preferences button:
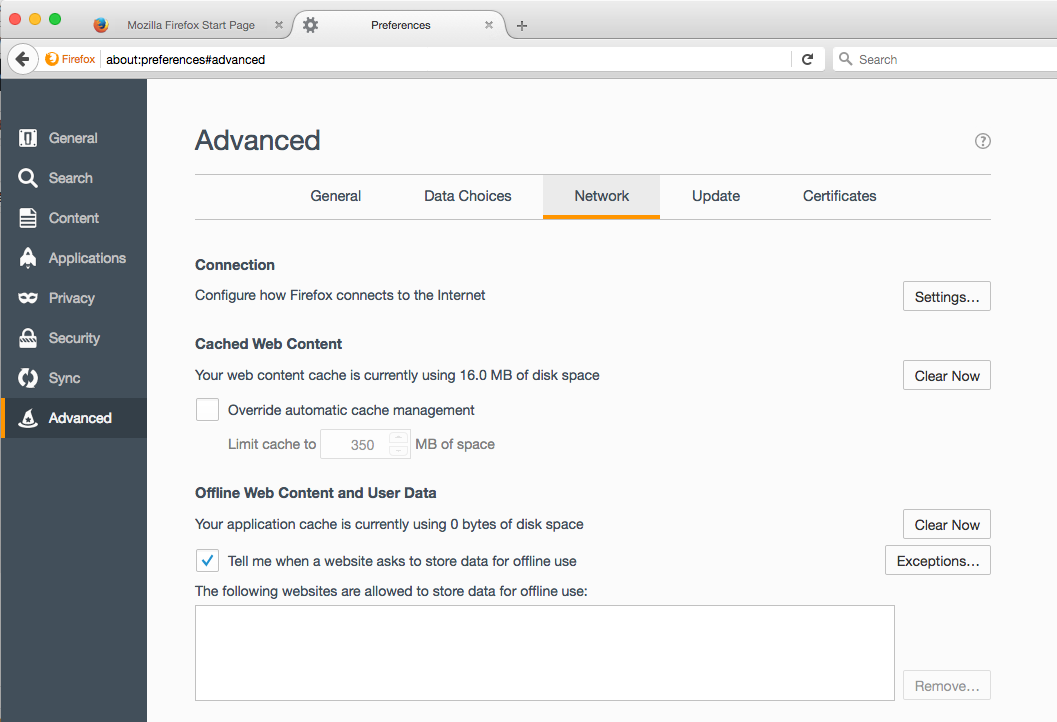
Once in the preferences tab, head to the Advanced tab and then the Network tab located underneath the Advanced tab.
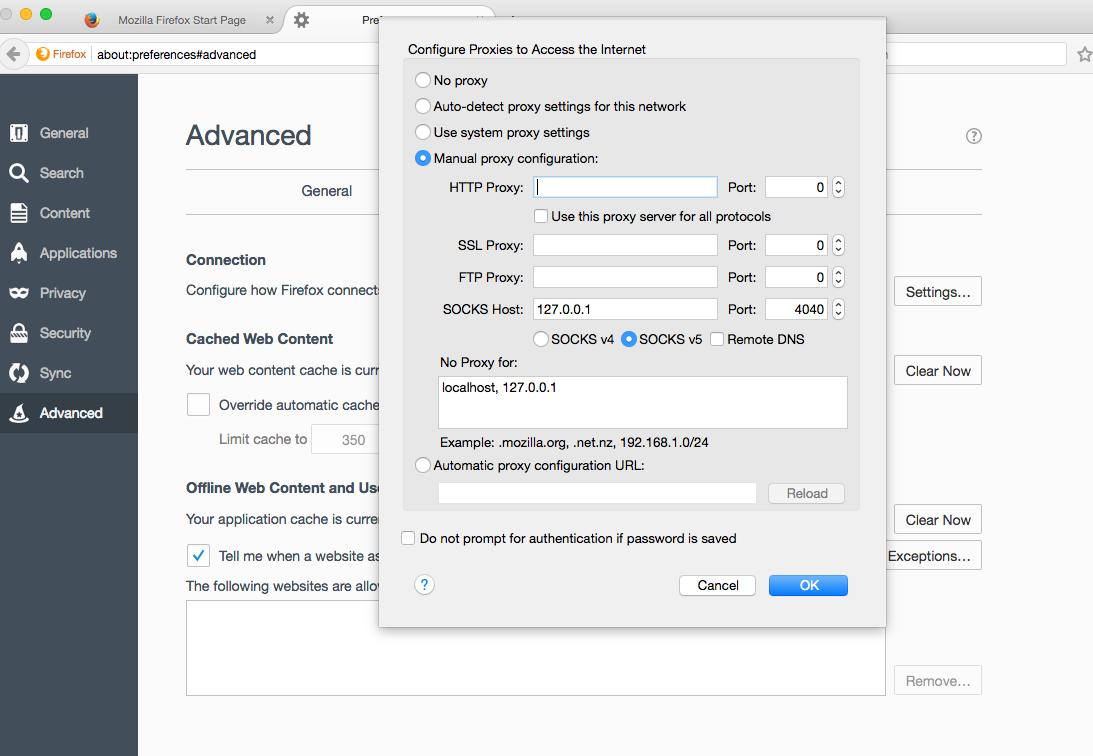
Now click on the “Settings…” button and you should now be in a menu that allows you to configure a proxy. By default the browser will have selected “No Proxy”, but you want to select “Manual proxy configuration”. You will then need to configure the proxy, most of which will remain the same regardless of the software you use, but you will need to pay attention to the port number as you want it to align to whatever port the webserver you are connecting to has open. For the sake of demonstration I am going to be using the port 4040, which is what the Spark web interface uses by default.
You are now telling your web browser to establish a SOCKS server on your machine using the port 4040. Now you need to make an actual connection to the cluster to forward data over this port which you can do with good ol’ SSH, in this case the command would look something like the following:
$ ssh -D 4040 slet1@maya.umbc.edu ## ssh -D {port_num} {uid}@maya.umbc.edu
The equivalent can be configured through PuTTy by first going to the “Connection > SSH > Auth” tab and selecting the “Allow agent forwarding” checkbox. Once this is selected you should go to “Connection > SSH > Tunnels” tab and add the corresponding port number selecting ‘Local’ as the destination.
Now once you are logged into one of the maya head nodes, you will officially be within the cluster’s firewall which means you can now access compute nodes directly from your browser. To get the appropriate IP address you need to run the following command on the node in which the webserver is running (usually the head node which is the first node of the allocation):
$ squeue -u slet1
JOBID   PARTITION NAME   USER  ST TIME    NODES QOS    NODELIST(REASON)
4291118 batch     hadoop slet1 R  2:01:32 4     medium n[233-236]
$ host n233
n233.cm.cluster has address 10.1.0.233
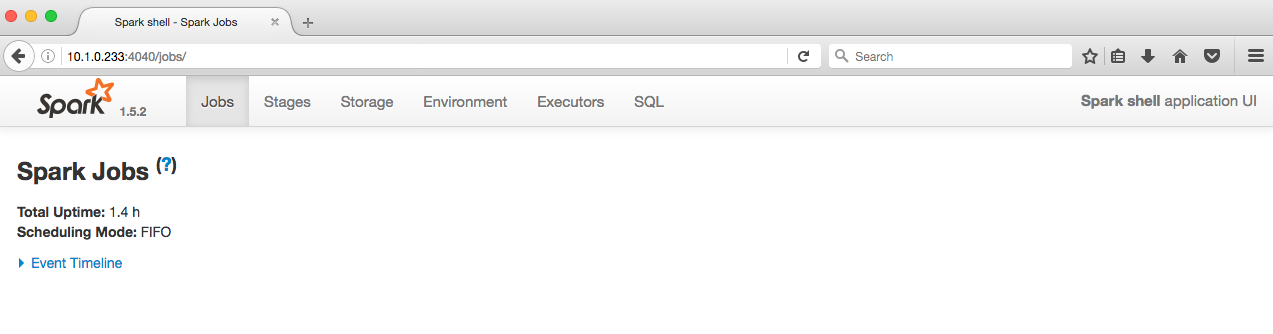
With all this done, we can finally access our webserver by entering the following into the browser URL line “{node ip address}:{port number}” in this case it would be “10.1.0.233:4040”
That’s it, tutorial finished!